The main requirements for landing a career in skateboard design vary depending on the role but typically include a digital portfolio showcasing your work and several years of experience working on smaller projects. When it comes to designing skate parks and graphic elements, some businesses look for applicants with at least a bachelor’s degree; for others, however, schooling may not be as crucial as your track record of producing high-quality items.
The tasks and obligations of a skateboard design profession necessitate artistic and communication abilities, familiarity with the production process, and the capacity to take into account criticism from a range of sources. The more time you spend creating skateboards, parks, or comparable products, the better, as experience is valuable in this field. It’s also beneficial to have a passion for skateboarding.
What Are Different Skateboard Design Jobs?
Skateboard design jobs fall into three major categories: footwear, skateboards, and skate parks. Designing in these fields requires different knowledge and skills. However, regardless of role, you may sketch sample designs or blueprints, determine the layout of a product or park, and collaborate with pro skateboarders to discuss design elements before the manufacturing process.
For shoes and skateboards, you may also help build samples, go skateboarding to test your product, and otherwise use feedback to improve existing designs. You may also work on unique projects, such as designing shoes or skateboards intended for people with prosthetic legs or other disabilities. Common titles include design intern, graphic design assistant, graphic designer, and design director.
How to Design Skateboard Decks
Dimensions
Skateboard designs should be prepared in 9 inches by 32.5 inches (or 23cm by 83cm). Skateboard designs need a bleed of at least half an inch or 1.3 cm. Designs are screen printed on heat transfer papers and heat transferred to skateboard decks. This allows the screen-printed ink to fixate strongly into the wood fibers of the skateboard deck.
Heat transfers are placed on skateboard decks by hand. Manual labor cannot achieve 100% accuracy in placing every heat transfer at exactly the same spot. The bleed of 1.3cm gives us a 0.65cm (0.256 inches) space on each side to ensure, that the design fits on the full surface of the deck.
Colors
Skateboard designs are screen printed in spot colors or CMYK. Most professional brands use spot colors for designs with a small number of different colors. Spot colors are mixed before the printing, resulting in very strong and clear colors. Each used color must be submitted with the corresponding Pantone color code. The Pantone color code is listed in the Pantone solid-coated color formula guide. After you send us the Pantone Color code, we will look it up in the formula guide and mix the ink accordingly. A famous brand for the use of spot colors is enjoy. Check out their designs and be inspired by their use of limited but strong colors! –
Designs with 5 or more colors are commonly printed in CMYK. CMYK printing means, that the design is divided into tiny Cyan, Magenta, Yellow, and Black dots. The dots are so small, that they are barely visible to the human eye. These dots are printed so closely to each other, that the human eye sees it as a separate color. A surface filled with Cyan and Yellow dots looks green for example. This is the same process as used by your printer at home with the difference of our screen printing the dots.
In comparison, spot colors look stronger and more intensive than CMYK colors. Spot colors are also much more accurate than CMYK. Each display differs by brightness, saturation, and color. If you take your printer and print your deck design at home, you will see that the colors will look different from the design on your computer. Pantone colors ensure that everybody understands which color is to be used.
Experienced skateboard companies create designs with multiple colors printed in CMYK. Usually, CMYK designs have weak colors, but by using the original C-Cyan, M-Magenta, Y-Yellow, and K-Black these brands achieve spot color-like saturation in multi-color designs.
You can do a test with your printer at home: Print a 100% Cyan surface and a Green surface. When looking closely you will see that Cyan is a clean color. Green however is made up of small Cyan, and Yellow dots.
White is the color of the background. So just as your printer at home can create a perfect white by leaving an empty space on paper, a CMYK skateboard design can create a clean white spot by leaving it unprinted. However keep in mind, that if small spots of up to 3mm within a CMYK design are left empty, the surrounding spots will fill it. If you work with very accurate white designs – prepare “white” as a further spot color.
Areas of your design can be left transparent to show the wooden deck veneer underneath the print. By switching the color of the bottom deck veneer, multiple colorways can be created with the same print. This is often used to save on print set-up costs. However note, that while white is usually a free color as it is used as the base layer adding transparent is calculated as a color! When adding transparent, we cannot print a full white bottom layer and instead have to create a white film that keeps the transparent areas free.
File Formats
The best prints are made from vector images, while the worst prints are made from compressed, low-definition, mixed-color, Jpg files. Vector images are great for artwork with a limited amount of colors. Especially spot color prints must be submitted as vector files. Vector files are often created by Adobe Illustrator and saved as .Ai or .PDF files. When working with vector files, make sure to vectorize all text. If you forget to vectorize text, any computer that does not have the same fonts will automatically replace the font type. This results in a completely different look for your design.
Photos and designs with a large number of colors are printed in CMYK. Good file formats without compression are TIFF or PSD. If you plan on printing photos on skateboard decks, and your camera saves photos as JPGs, make sure to not further compress the images. When saving your artwork as Jpg, save it with at least 300 dpi (dots per inch) and a size of 9” x 32.5” (23cm x 83cm).
Upload to 2HEX Skateboard Factory
While vector artworks can be very small in file size, photo prints can sometimes reach file sizes of over 50 MB. If you happen to work with big files, the upload on 2HEX might take you too long. In this case, upload a preview of the artwork and send us your artwork by email after receiving the production confirmation email.
Tips For Skateboard Graphic Designer
Knowledge
Have at least decent knowledge of skate graphics. With two volumes of Sean Cliver’s (amazing) Disposable books, there’s really no excuse not to. Who wants to be the asshole that pitches a screaming hand graphic to Santa Cruz? Not me.
Also, you are going to need to know who to pitch your wares to, right? Every company is different. Who is the Art Director? Is there an Art Director? Sometimes the Team Manager steers the graphic ship, sometimes it’s the owner. Find out these things. It’s way easier in the social media days we live in now than it was in 2003. Sometimes the generic email address will get you a response but most times not… Make Google your new best friend, LinkedIn can be very handy also. Not that you needed an excuse, but you should also read as much skateboard media as possible
Professional
Even if you draw everything by hand, you should have some working knowledge of Photoshop and Illustrator. You should also be able to handle questions for the project, like if there’s a Kill Fee (when a company will pay for your time even if a project isn’t produced.)
You also need to know how to work within a budget, submit an invoice and meet deadlines. This should all be covered before you start drawing. Know what you are getting yourself into to avoid surprises. In some cases the process of getting paid and the paperwork has taken more time than the actual artwork itself.
After getting the okay for a project, you go through several approval processes: after 1st sketch, after inking and again after coloring. It can cost time waiting to hear back from your contact but it will save a headache when you are asked to completely redo something. In my opinion, once a project is approved, the company is on the hook to pay for it but they don’t always see it that way. You may even end up spending hours on a board that they decided not to make at the last minute. Know these things and you will be better off because it varies from company to company.
Be Determined
You may not hear back. Shit, you probably won’t hear back, but you have thick skin, right? You might hear your style doesn’t match well, and it may not. Don’t pitch a Creature type graphic to a company with a whole different vibe.
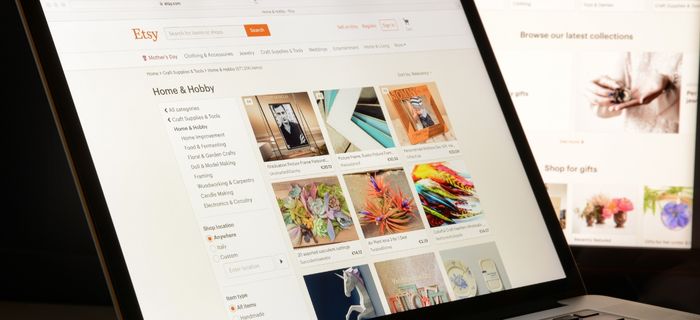
Read Also: What Can Graphic Designers Sell on Etsy?
You may be told you are not good enough, and maybe you aren’t! You don’t have to start out swinging for the fences though! Start by hitting up smaller companies, or local shops, or really anyone who can help you get your work in front of people. You can also try to do as much apparel, print, or extra work as possible. It’s all a means to an end. Flow to Am to Pro if you wanna get all skateboardy with terminology.
Promotion and Goals
It’s a social media age, and there are a lot of eyes staring downward at little tiny screens. Promote your work in any way you can. Instagram is the perfect medium for this, as well as Twitter/Facebook/Tumblr/Livejournal/Myspace. You can build countless contacts through these avenues and got quite a bit of work that way.
Persistence vs. Annoyance
Build relationships, and keep in touch, but not so much that it becomes overbearing. No one wants to hear from you all the time, but the occasional update, or check in can really help you out. There are a lot of really great people in the industry, and it’s a really interesting business. Learn as much about that side of things as possible and keep on it.
How Do I Become a Freelance Graphic Designer?
To become a Freelance Graphic Designer, you will need to find clients, market yourself and grow your network. You will need strong design skills, as well as an understanding of how to run a business.
1. Learn and practice graphic design
To begin, you will first need graphic design knowledge and experience applying your skills. You can learn graphic design by taking a design course and developing personal projects.
2. Brand and market yourself
Come up with a name for your business, which could simply be your name. Create a web presence for yourself and build a portfolio that highlights your best work. Make it easy for potential clients to find and contact you.
3. Find clients
It’s essential to secure your first clients as soon as possible. This will get your business off the ground and help you build confidence and momentum. To find clients, you can try searching freelance job websites, or turn to your personal network. Ask friends, peers, or relatives if they know anyone who is looking for a Graphic Designer.
4. Overdeliver on your first projects
The first project you complete for a client should be exceptional. Overdeliver and impress them with your skills. They will then be more likely to hire you again or refer other contacts to you.
5. Learn the business of design
As a Freelance Graphic Designer, you run every aspect of your business. You will need to perform essential tasks like marketing, sending proposals, and writing invoices.
6. Accept most incoming work
When you first start your business, you will want to take on the majority of work that comes in. This is essential for building your client base. Once you have become more established, you can certainly be more selective about the work you choose.
7. Build your network
As a freelancer, your network—which includes current clients, past clients, potential clients, peers, friends, and family — is an essential part of your business. You should always be looking for new clients. Freelance work can be unpredictable, which means you may have an influx of projects one month and little work the next month. To increase the chances that you will have a steady stream of work, dedicate time each week to reach out to clients. This may include cold calling, networking, or marketing activities like SEO or social media advertisements.
8. Ask for referrals
Word-of-mouth marketing is one of the best ways for Freelance Graphic Designers to gain more clients. After you have completed a project and impressed a client, ask if they know anyone with graphic design needs. Referrals will likely become more organic over time, but build this into your workflow when you first start out.