Alaska is a little community with a population of barely 3,000. Other than the one in front of the fire hall, which is switched on to allow the fire trucks to enter and exit, they don’t have any stop lights. They can ferry to Juneau but it takes around 8 hours on the boat during the winter. Every day there is jet service, so it just takes four hours to get to Seattle or Anchorage.
Getting fresh food can be somewhat challenging while living in an area like this. Yes, there are a few tiny grocery stores here, a summertime truck service that delivers produce, and a farm-to-table program that ships produce from Washington every other week.
It’s really a stretch to consider some of these “fresh”. Eating locally is a significant way to enhance the foods you consume. Foods grown nearby are much better for the environment, the community, and your health. In most cases, local product is sold the same day it is harvested. It implies that the product likely has the highest nutritional content and flavor.
The food you purchase, even the “fresh” produce found in many stores, usually travels thousands of kilometers, if you aren’t aware of this. Food is transported throughout the nation and the world by truck, plane, rail, and barge.
Buying your food locally helps keep your money local. You can pay a neighbor in place of a big corporation with nationwide corporate offices, advertising costs, and other overhead. That neighbor is going to do his shopping locally. They are more likely to be re-using grocery bags, limiting their use of chemicals, driving a short distance to the market… It starts to cascade into other sustainable living decisions.
Step 1: Develop Partnerships and Advocates
A “farmer’s market” seems like a funny term to use on an island without a single traditional “farm” so we had a vision of the market that also included handcrafts, artwork, musicians, and other vendors.
If you don’t already have a market in your area there are probably a lot of other people already considering the need for a farmer’s market. Contacting local gardeners, craftsmen, artists, community garden organizers and musicians will give a good indication of the interest. If you have a vision or example of the market you would like to see, try and depict it well for prospective sellers. But at this point you need to make connections that are interested in making the market effort a success.
Skills that are valuable include people with accounting experience, people with non-profit organizational expertise, marketing whizzes, and of course, someone with the drive to keep the ball rolling!
Step 2: Location, Location, Location

This is important. And can be quite difficult. Weather in your area might be restrictive. We decided on an indoor location purely because of the weather restraints. (Although later, insurance requirements also helped us chose our location.) We also wanted to be close to the downtown area which was a popular choice with the Chamber of Commerce. Seeking possible locations early on will also help determine needs for vendors (such as if they need to provide a tent or tables), available parking, and social or educational areas if you plan on having music, activities or sessions taking place during the market.
Step 3: Come Up With Rules

In envisioning the market do you see lots of vegetables? Or are there stalls full of handmade crafts and other goods? What about someone selling socks that they designed but had made in China? Or a family with a table full of garage-sale items? Can someone sell cans of soda with their food or should drinks be more “homemade” than that? What about a bike shop doing repairs or a brick-and-mortar clothing store selling their lines? Packaged food?
Some rules will come from your state agencies. Be aware of the rules that govern food service permits. For our market we provided copies of the application and guidelines to vendors that planned on selling food.
Read Also: Top 10 Farmers Market in the US
Also look up the regulations regarding sales tax and business licenses for your area. You may not, as the organizing group, be responsible for making sure that vendors have all of the proper arrangements to sell to the public, however, if you’re aware of violations what is the responsibility of the market organizers?
What about children having booths? Or booths set up for informational purposes? Or even political purposes?
Some issues will need to be dealt with as they come up. You won’t be able to forecast all of the potential hurtles. However, providing some direction about the intent of the market – the feel of it – will set the tone for the vendors.
Step 4: Determine a Schedule and Fees

Part of choosing the location also must involve considering the schedule. Will the market be weekly? Monthly? Or perhaps have an intermittent schedule?
We worked our schedule so there were normally two markets a month through the summer and early fall. We skipped weekends around local festivals because of two reasons. First, it’s a busy time and there is plenty to do. Second, because some of the vendors we hoped to have at the market would be selling at street booths during festivals.
Determine the length of each market. We started with four hours – 10 AM through 2 PM. After a few markets we trimmed it to close at 1 PM. The crowd just tended to come earlier and by 1 it was just the vendors milling around and socializing. We’d rather have a larger gathering of the community than have people just casually walking through an empty marketplace. Make it feel active!
Determining a fee structure should come next. Having a rate for each market and a discounted rate for the whole season could provide an incentive for people to commit to the longer term.
Perhaps your fees are based on the size of the area needed. Are children’s booths discounted? Is there an area that is more desirable because of better visibility or higher traffic? What kind of access is available for unloading and then packing up?
Step 5: Jump Through the Hoops

Here’s where things get a little rough. You may need to form a non-profit, get insurance, hire staff and otherwise jump through bureaucratic hoops. There are, however, a few ways around much of this hassle. Check out a large market like the San Francisco Underground Market for some inspiration here.
We managed to find a location that had a commercial kitchen that they let a rotating vendor (of our choice) use and didn’t require any insurance. So we managed to get going the first year without the structure and restrictions of a non-profit.
The University of Florida has some excellent information on some of the information that might be helpful in the creation of a full-fledged Farmer’s Market. Your state probably has a coordinator that will be able to help with some of this as well. Contact other markets in your area for support. Or the cooperative extension service in your area.
One of the fun things to do during this step? Figure out a name!
Step 6: Recruit Vendors


Once you have the structure built for the organization it is time to start filling booth space. Every location will have different marketing opportunities. We took advantage of the local public radio station’s classified ad broadcast. It reached out to people beyond the central “municipality” especially those that resided in more remote areas and lived a more self-sufficient lifestyle.
We had a core of gardeners, cooks, craftsmen, artists, musicians, and other people that were very interested in the market. The most popular booths were the baked goods and the major produce providers. But photographers, knitters, painters, and all sorts of other contributors helped make the market a wonderfully well-rounded experience for everyone.
Step 7: Add Music

We had a wonderful community of musicians that were willing to come out for free and play music for a little while during our markets. Pianists, young fiddlers, full bands… we had a full range of musicians.
We scheduled them to play during our peak times – from about 11 to 12 each market.
Step 8: Make It for the Whole Family!


Our vision was to have the Market be a gathering place for the community. To not only shop locally but also to socialize with old friends, meet new people, see what creative things are happening in town and provide a place for the whole family.
We allowed for any children to have free booths. They learn about sales, managing money and budgeting through their family members (we found all participating children had participating parents too).
Our last market of the year we made more carnival-like. There was face painting, a petting zoo area, and other activities for kids.
Step 9: Market the Market!

Marketing – it’s not just going to the market! It seems no matter how hard you try you’ll still have people that will have never heard of your market. On an island with 3,000 people, one weekly newspaper, one radio station and a dozen bulletin boards you would think you could pretty easily make everyone aware of our market. On the day of the market we even posted signs at the main intersection of town that said the time and place.
But even after a few months some people hadn’t heard about the Market.
We used classified ads, display ads, and even had photos and stories written in the paper. We were on the radio station almost weekly. We even made new fliers for many of the markets so the bulletin board postings wouldn’t get too stale. Of course, word-of-mouth from attendees and vendors helped.
How do You Stand out at a Farmers Market?
Point of Purchase Advertising International (POPAI) reports that 62% of consumers admit to making impulsive purchases because they were drawn in by the display.
Try some of the following advice to boost sales at upcoming markets and promote more impulsive purchases.
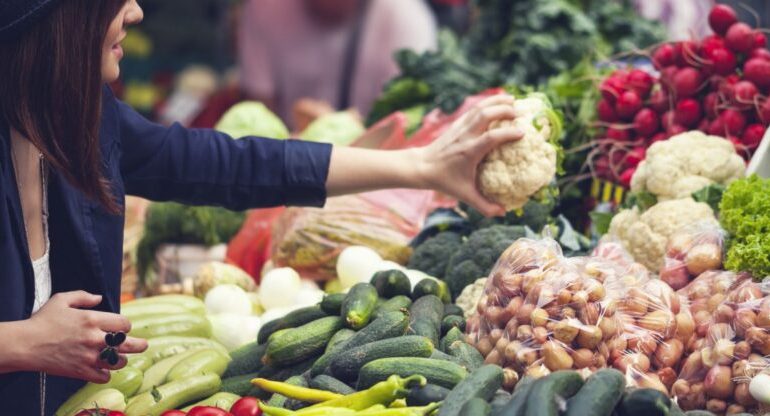
1. Create a Sense of Abundance
Farmers market displays that appear to be teeming with goods are more appealing to potential customers than ones that seem scarce. Think about the produce displays at your local grocery store, for example—they always give a sense of abundance.
Take some cues from those merchandisers and try the following strategies to create generous, yet organized, displays:
- Leverage vertical space by stacking items on top of each other or by using shelves and racks.
- Use baskets and crates to organize items.
- Colorblock products to give a sense of variety at your booth.
2. Don’t Over Clutter
Yes, you want your display to look abundant and well-stocked, but not at the expense of organization! There is a fine—but important—line between a bountiful booth and a cluttered one.
You don’t need to cover every square inch of your setup with stuff.
Strategically leaving space accentuates what you have on display, drawing the eye to your shelves and baskets. While props and other decorations can be fun to add, be careful not to overdo it or you’ll distract customers from what you’re actually selling.
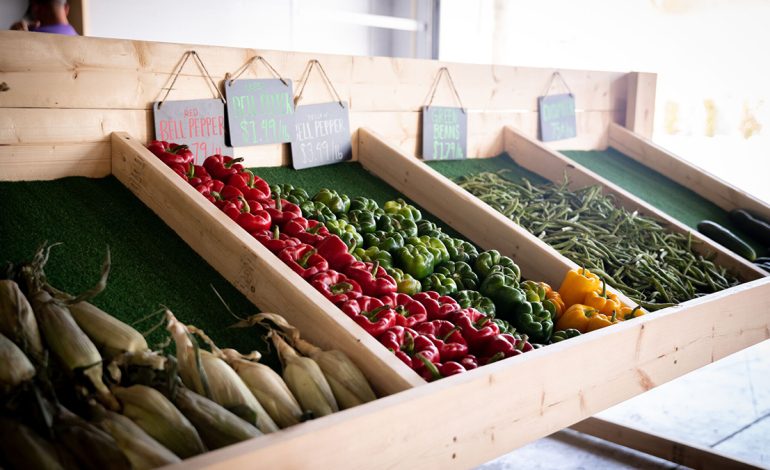
3. Clearly Label All Items
Many customers feel uncomfortable asking a seller about the price of an item they’re interested in. They may be less likely to make an impulse purchase if they have to take this extra step.
To avoid missing out on potential sales this way, create labels that are easy to read and secured in place so they don’t blow away when a gust of wind comes by.
Don’t be afraid to get creative with how you display prices, either! Chalkboards, whiteboards, and letterboards can add visual flair to your space while still being functional.
4. Offer Free Samples
Everybody loves free stuff! Offering samples gives you a great opportunity to educate customers about your products and for them to form an emotional connection with your product.
That bite-sized piece of your delicious lemon pound cake might just be the final push they need to make a purchase.
When offering free samples, display clear signage about those freebies around your booth! This is a great way to attract potential customers who are curious about what you have to offer but might not have otherwise stopped by.
5. Tell Your Story
A study by LeapMesh found that effective storytelling led to a 30% increase in conversion rates, meaning people are more likely to make a purchase when there’s a story element involved.
You can capture this magic at your booth by displaying photos accompanied by short captions that let customers know what they’re looking at.
- Grow your own produce or ingredients? Include a picture of your greenhouse or garden.
- Running a family business? Display a picture of your family and the history of your operation.
- Have a website or a social media presence? Add your website and social handles to your signage and business cards.
- Sell your goods online? Include signage with details on how and where customers can order from you.
These little additions to your table can make a big impact, as they help humanize your business and build emotional connections with customers. That in turn makes them more likely to want to buy from you.